FRAME CONSTRUCTION AND MOUNTING
By Ken Spelke, Champaign, Illinois
 For my
O Gauge background, I chose the 36" x 12' sized scene. In order to protect the picture from damage during layout construction, and to ensure maximum flexibility, I decided to mount it on a custom-designed frame. This narrative and accompanying photographs show the various steps I used for construction, really a very straightforward and
simple approach. For my
O Gauge background, I chose the 36" x 12' sized scene. In order to protect the picture from damage during layout construction, and to ensure maximum flexibility, I decided to mount it on a custom-designed frame. This narrative and accompanying photographs show the various steps I used for construction, really a very straightforward and
simple approach. |
| First, I went to our local lumberyard, and found a very helpful and skillful employee who agreed to take a piece of 1" x 4" pine, 14' in length, and rip it into two 1" x 2" 14' - long pieces. This was quite inexpensive, and provided the top and bottom sides of this rather long frame. Regular
firring strips (1" x 2"s) don't come this long because of warping, knot holes, etc., so the 1" x 4", split in two, is just perfect for the job. Remember, the object here is
light, but strong.
|
|
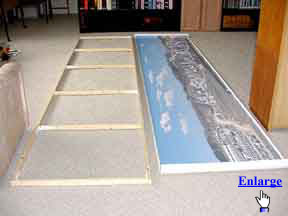
I laid the Background out on a carpeted, clean floor, so I could measure and cut the long pieces exactly to the precise required length.
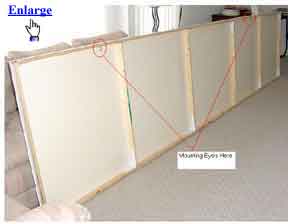
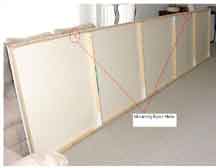
End pieces for the frame were then constructed out of regular 1" x 2"s, and I created a ladder-type configuration, placing cross pieces (or ladder steps) at several points over the frame's length. Pre-drilled holes (IMPORTANT TO AVOID SPLITTING THE WOOD!) were used, along with wood screws, to securely connect all sides and ladder cross members. |
| I then purchased from a local home center, lightweight aluminum shelf brackets which were screwed into all corners (including where the cross members attach to the top and bottom rails) to reinforce the ladder construction. These brackets add strength with far less weight than steel angle irons. |
|
................ |
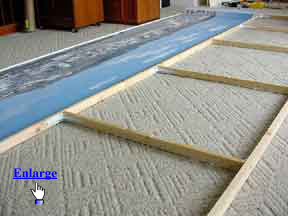
When this construction was complete, I covered the frame with sheets of foam core (readily available in art supply and hobby stores).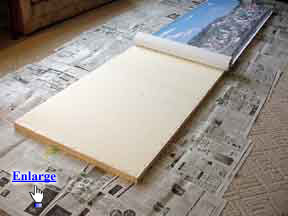 For this size, I used three, 36" x 60" pieces, which required very little trimming. The foam core was attached to the ladder frame using a heavy spring staple gun. Clear shipping tape was cut in small pieces and placed over the staples to avoid indentations which might show through the mounted picture and to prevent any future rusting of the steel staples from damaging the
picture. The shipping tape was also used to cover the seams where the three foam core sheets met.
For this size, I used three, 36" x 60" pieces, which required very little trimming. The foam core was attached to the ladder frame using a heavy spring staple gun. Clear shipping tape was cut in small pieces and placed over the staples to avoid indentations which might show through the mounted picture and to prevent any future rusting of the steel staples from damaging the
picture. The shipping tape was also used to cover the seams where the three foam core sheets met. |
|
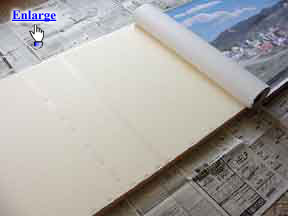
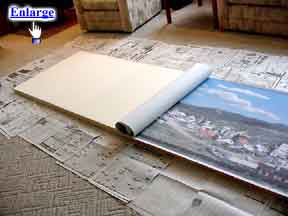
Elmer's Spray Adhesive (E-451) was applied to the entire foam core surface, and the Background was carefully rolled out, starting at one end, and slowly smoothing out the surface from the center out to the edges across the entire length using a clean paint roller and new roller cover (an extendable length roller works especially well here). While still tacky, I was able to neatly fold the corners and overlapping Background material around the frame edges, making corners similar to those used to wrap gift boxes. . |
|
......................................
....
|
|
|
............... |
|
|
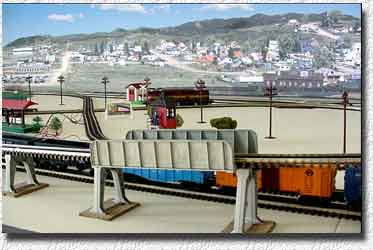
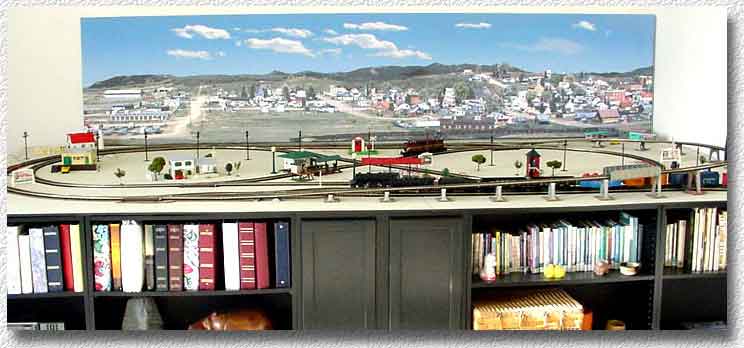
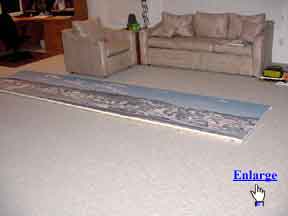
Finally, I screwed threaded steel eyes into the top underside of the frame (be careful not to pierce all the way through the top!), and I placed large screws and wall anchors in the corresponding positions on the wall where the Background was to hang (measure several times and use a level to assure proper and square placement). Two or three eyes are plenty to support the frame and picture's weight. What I now have is a PERFECTLY MOUNTED, 12' SCENIC BACKGROUND which can easily be removed from the wall whenever I need to paint, spray, ballast, or do other layout chores which could damage the picture. Also, if we ever move, we can simply take our BackDrop Warehouse Background with us, and the new homeowner will have only two holes to spackle in order to bring the room's wall back to its original condition. | 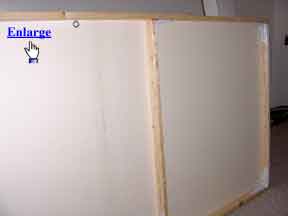
|
.............
|
|
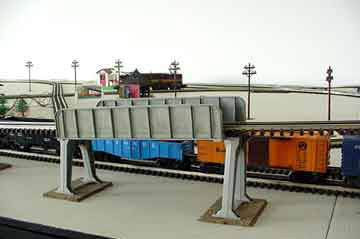
Later on, and this is another advantage of frame mounting over mounting directly on the wall, I plan to cut out some of the windows in the rural town scene I purchased with an X-ACTO knife, place some low power white LEDs inside the frame, and add an on/off switch so that some of the town's buildings will have illuminated windows for our night train operations!
|
|
|
|
|
|
|
Can you write an Article If you would like to write an article on how you installed your BackDrop, we are interested. Good articles like this one will be included on our web site. Payment is typically around the cost of the backdrops used but may be more or less depending on the number of backdrops involved and the quality of the article. Many well lighted photos are a must. We may submit good articles for review at major model railroad magazines. All photos and text are your property (except we have the right to use any sent to us on this web site) and arrangements for publication and payment are between you and the magazine. We will match the payment from the magazine up to $200 as long as our company is mentioned as the supplier of the backdrops. |
 After
allowing the adhesive to dry - about an hour - I ran 2" clear packing tape tightly around the frame's
perimeter, and then, again using the staple gun, stapled all around the top, bottom and side edges, penetrating the tape, Background media, and into the wood frame.
.
After
allowing the adhesive to dry - about an hour - I ran 2" clear packing tape tightly around the frame's
perimeter, and then, again using the staple gun, stapled all around the top, bottom and side edges, penetrating the tape, Background media, and into the wood frame.
.