![]()
HOW TO INSTALL TWO SCENES USING RUBBER CEMENT
By Edward Ehret, Kitchener, Ontario, Canada
|
My background scenery consisted of joining two (2) scenes A and B. Since concrete walls are never flat or parallel, I decided to build my frame work on a flat floor, and then mount it to my basement concrete wall. |
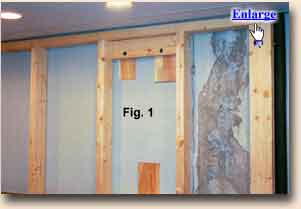
| Fig, #1 I used cedar shingles to level the wall flat and square. Fig. # 2 Insulated and covered the frame work with plastic to prevent any moisture coming through.
|
|
|
|
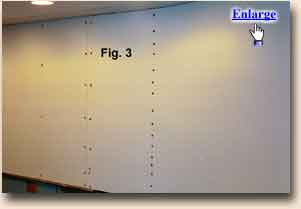
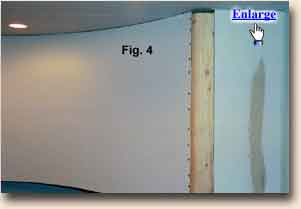
Fig. # 3 Mounted ¼" white masonite, with dry wall screws. Since I had a curved corner, I used the ¼" masonite, and only had to screw in the two ends. Fig. # 4 Bending the masonite to a desired visual corner resulted in a uniform radius. |
|
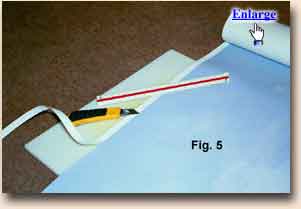
Fill in any seams or holes with filler. Sand and clean the wall to ensure that there is a clean flat surface. Since I had to mount two (2) long scenes, I decided to staple the backdrops to the masonite. Roll the scene out on a clean floor. Using a "new sharp" blade, straight edge and a cutting board, trim off the "white top" on the backdrop. Fig. # 5
Fig. # 6 Trim any excess off the ends. It is "not" required to have perfectly square ends, where the seams match. But a smooth clean cut is required for best results. |
|
................ |
|
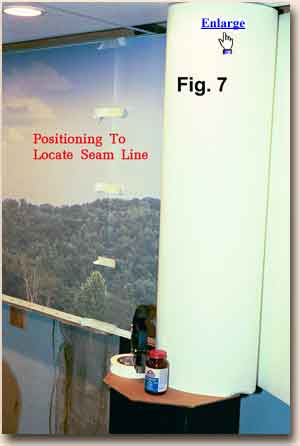
It is highly recommended to match the seams using an "overlap" procedure. There is allowance for a four (4") overlap at each end. Fig. # 7 To make this an easy one (1) person operation, I placed a clean pipe through a Working from left to right, I mounted scene "A" (left side) first. Attached backdrops using staples at the top and bottom of backdrop. If you are mounting the "right" side scene "first" REMEMBER to reverse the following procedure. Since I decided to staple the scenes to my masonite, I had to come up with a clean "simple" procedure to attach the seams. This procedure is simple and gave excellent results. Use "Elmer’s Rubber Cement", to do all gluing operations. Use "Scotch - 3M" ( Safe –Release ) masking tape for a guide, and to protect the backdrops. |
|
|
|
Once satisfied with the overall look, attach small strips of masking tape.
|
|
|
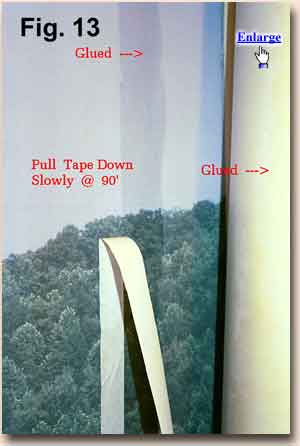
Fig. # 13
Once the glue is "DRY", slowly remove the protective tape line. Now slowly roll out scene "B" over scene "A". The two glued surfaces (dried) will attach to each other once the surfaces touch each other. No glue will ooze out from under the seam because the glue is dry. |
|
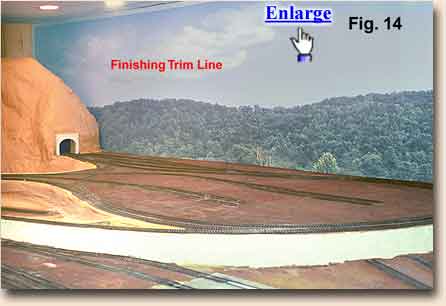
Fig. # 14 To cover the top staples used to apply the backdrop scene, I used the same masking tape to make a nice straight transition from backdrop to ceiling.
|
|
Can you write an Article If you would like to write an article on how you installed your BackDrop, we are interested. Good articles like this one will be included on our web site. Payment is typically around the cost of the backdrops used (limit $300) but may be more or less depending on the number of backdrops involved and the quality of the article.
Many well lighted photos are a must. We may submit good articles for review at major model railroad magazines. All photos and text are your property (except we have the right to use any sent to us on this web site) and arrangements for publication and payment are between you and the magazine. We will match the payment from the magazine up to $200 as long as our company is mentioned as the supplier of the backdrops. We can retouch and improve your photos for no additional charge.
|

 Trimming off the top will ensure that no flaws can be seen when matching to an irregular ceiling. This
will allow for any fluctuation when mounting. Remember that the sections will
overlap each other !!!
Trimming off the top will ensure that no flaws can be seen when matching to an irregular ceiling. This
will allow for any fluctuation when mounting. Remember that the sections will
overlap each other !!!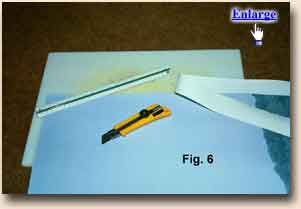
 box. The box is supported using a work mate work bench. The backdrop roll is supported and easily rolled out, preventing any creases or rips !!!
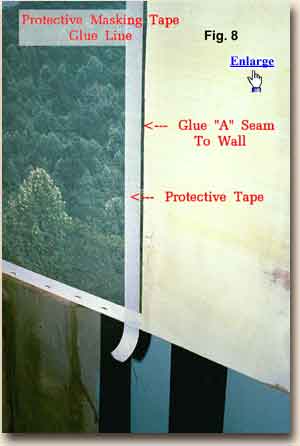
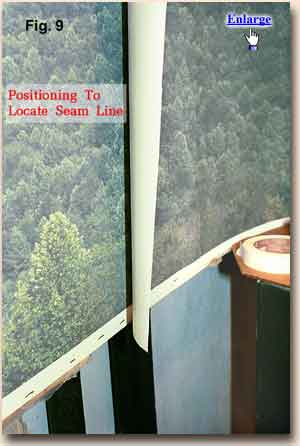
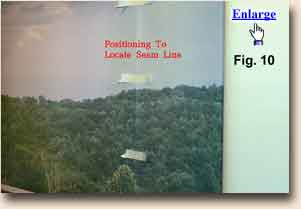 Fig. # 10
Do "NOT" flatten tape ends flat onto backdrop. This will prevent any damage to the image. Staple scene "B" to masonite. "NOTE"
allow for scene "B" to be rolled back at least 8" to allow for gluing.
Fig. # 10
Do "NOT" flatten tape ends flat onto backdrop. This will prevent any damage to the image. Staple scene "B" to masonite. "NOTE"
allow for scene "B" to be rolled back at least 8" to allow for gluing. 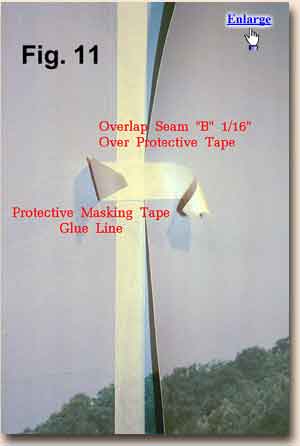 Use scene "B" overlap position as a guide line. Working in sections, from the top down, place the "right" edge of the masking tape, 1/16" under section "B". The ending result should have section"B" overlap the masking tape 1/16".
 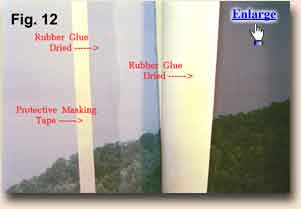 Now apply glue evenly, (2" width) to the "right" side of the masking tape. There is no need to "rush" this operation. Take care not to get any glue on the visual side. Now apply glue evenly to the "underside" (2" width) to section "B". To assure for an excellent adhesive result, repeat the same procedure as above. This will result in having two (2) coats of glue in the same area. DO NOT ATTACH SEAMS YET !!! First let the glue dry, before attaching.