USING RUBBER CEMENT on an EXISTING LAYOUT
By John Thompson, Colorado
|
For my Hon3 version of the Rio Grande Southern, I wanted a visually stunning backdrop of Lizard Head for my model of the wye at the summit of Lizard Head Pass. Backdrop Warehouse had exactly what I needed, and after some research, I decided the Rubber Cement method mentioned on the website would work well with the curved backdrop support I had installed. Here’s how I installed the photorealistic backdrop on my railroad. In Fig. 01,
|
|
Materials
Figure 2 shows the materials used. A straightedge and either a sharp utility knife (use a brand new blade) or a rotary cutter works well to cut the backdrops to the necessary size. |
| Application of Rubber Cement
Figure 3 shows the application of the glue – I’m applying the second coat in this shot. A strip of glue along the top, bottom, and middle for 24" tall backdrops or larger, is all that is needed to hold the backdrop to the support board.
|
|
................ |
|
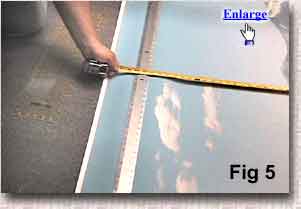
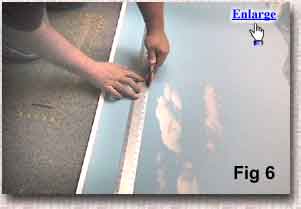
Measuring and Cutting
Figures 4, 5 and 6 show the cutting of the backdrop to fit the vertical space. In figure 4,
|
|
. |
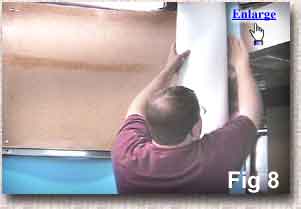
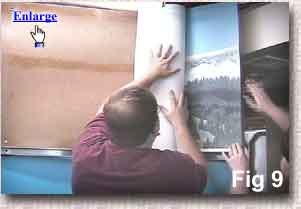
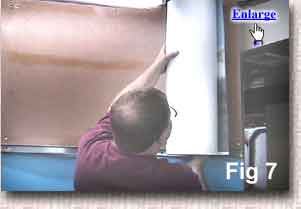
Install backdrop In figure 7, I have applied a third coat of rubber cement on the edge of the support board, as well as about a foot in from the edge on the top, middle, and bottom. Again, the glue dries incredibly fast, so you can only work a foot or two at a time. I align the edge of the backdrop with the edge of my support board and use light hand pressure to adhere the backdrop to the board (Fig. 8), making absolutely sure I’m parallel to the horizon – a slight mistake here can lead to an unsightly and aggravating rise over the length of the backdrop. I then unroll the backdrop a short distance (Fig. 9). |
|
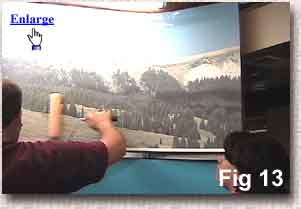
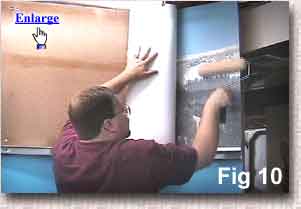
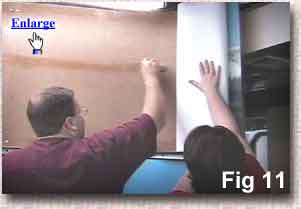
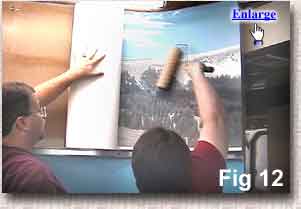
I use the clean paint roller to go over the surface of the backdrop to adhere the glue (Fig. 10), and roll the backdrop back over the just-glued section so I can apply another foot or so of glue (Fig. 11). Go easy on the paint roller – a few passes are sufficient to get the backdrop to lie down. Figures 12 and 13 show the continuation of the process, note that a helper makes the installation much
easier.
|
|
||||
|
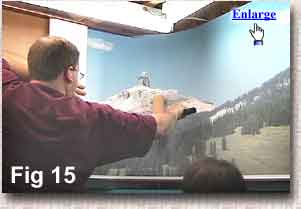
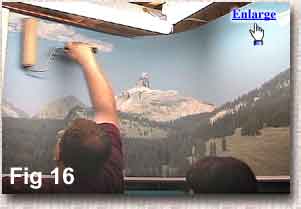
 Applying the backdrop into a corner works the same way as on a flat surface with the rubber cement technique. Apply the glue a foot or so over on the top, middle and bottom glue "bases"(Fig. 14), unroll the backdrop, and carefully press out with the paint roller (Fig 15, Fig. 16). The corner on my layout is also the focal point, and some planning was done to make sure Lizard Head was at the center................ Applying the backdrop into a corner works the same way as on a flat surface with the rubber cement technique. Apply the glue a foot or so over on the top, middle and bottom glue "bases"(Fig. 14), unroll the backdrop, and carefully press out with the paint roller (Fig 15, Fig. 16). The corner on my layout is also the focal point, and some planning was done to make sure Lizard Head was at the center................ |
|
|
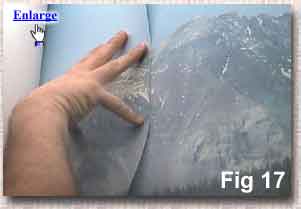
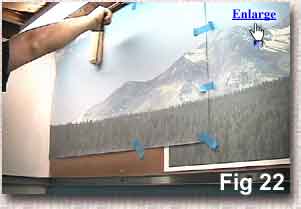
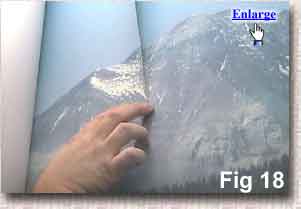
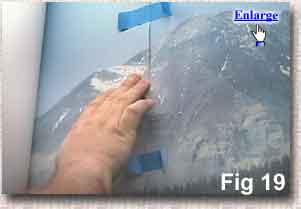
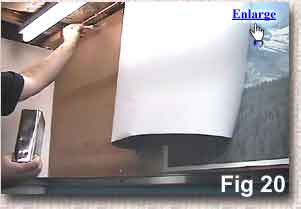
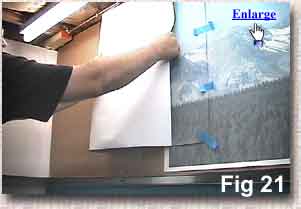
Seams Matching seams takes some planning and care, however it’s not too difficult to get a good match. This method overlaps the backgrounds, allowing for good alignment. Cut the overlapping background’s edge in a couple inches to minimize edge distortion and ensure a good match. Begin your matching by aligning major features of the backdrop – in Figure 17 and 18, I’m using the mountain and the trees to align the backdrop. Lightly tape the backdrop exactly where you want it, and double-check your seam for a good match (Fig. 19). Be sure to "fold over" the edges of the tape so you can remove them later. Once the backdrop is aligned, glue and apply the backdrop to the support board, but leave the taped overlapping section unglued at this time. This can be seen in figures 20, 21, and 22.
|
|
.............
|
||||
|
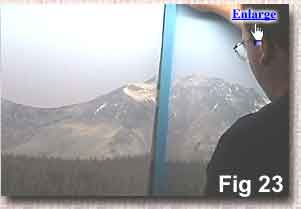
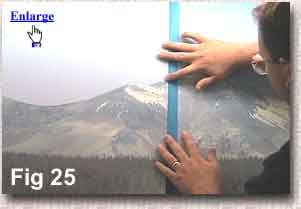
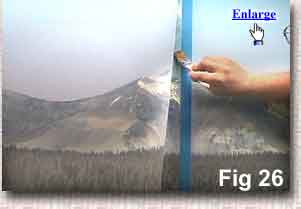
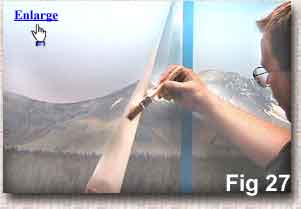
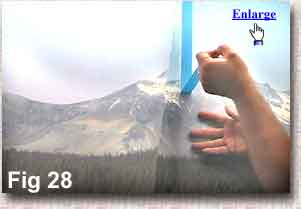
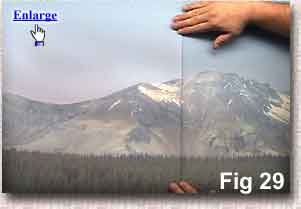
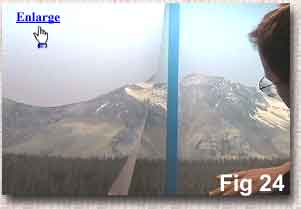
Once the glue has dried on the rest of the backdrop, you can carefully remove the tape from the overlapping section. Next, apply a single length of tape on the bottom backdrop piece; making sure the tape edge facing the overlapping section is about 1/32" inside the overlap when you press the overlapping section flat, as seen in figures 23, 24 and 25. This is your glue line, and will keep stray rubber cement from getting on the visible portion of the lower backdrop. Apply rubber cement on the face of the lower backdrop (fig. 26) as well as the back of the overlapping backdrop (Fig. 27) and allow to dry until tacky to the touch – 30 minutes is more than sufficient. Once it is dry, you can carefully remove the tape (take extra care and work slowly)(Fig. 28). Press the top layer onto the bottom layer (Fig. 29) and gently roll the seam with the dry paint roller. You’re done!
|
|
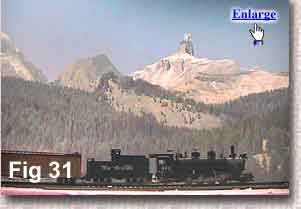
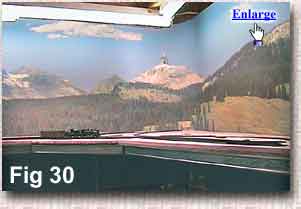
Figures 30 and 31 show some benchwork, roadbed and track in place. Even with no foreground scenery, the backdrop lends tremendous realism to the scene. All that’s left is to add a few hills and trees and some spot lighting and the scene will be complete.
|
|
|
Can you write an Article If you would like to write an article on how you installed your BackDrop, we are interested. Good articles like this one will be included on our web site. Payment is typically around the cost of the backdrops used but may be more or less depending on the number of backdrops involved and the quality of the article. Many well lighted photos are a must. We may submit good articles for review at major model railroad magazines. All photos and text are your property (except we have the right to use any sent to us on this web site) and arrangements for publication and payment are between you and the magazine. We will match the payment from the magazine up to $200 as long as our company is mentioned as the supplier of the backdrops. |
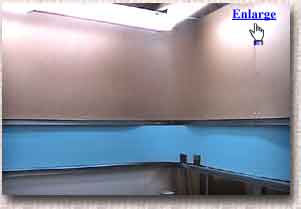 you can see the starting point for the backdrop installation. The layout itself is two levels in this area, and the backdrop will go on the top, unpainted portion of
Masonite. You will notice I didn’t bother filling and sanding the seams of Masonite – in fact, I left a small gap for expansion and contraction of the board. While the backdrop will be glued to the surface, it’s not applied like wallpaper, and the tackiness of the rubber cement method will allow for the minute contraction and expansion of the board while holding the backdrop fast.
you can see the starting point for the backdrop installation. The layout itself is two levels in this area, and the backdrop will go on the top, unpainted portion of
Masonite. You will notice I didn’t bother filling and sanding the seams of Masonite – in fact, I left a small gap for expansion and contraction of the board. While the backdrop will be glued to the surface, it’s not applied like wallpaper, and the tackiness of the rubber cement method will allow for the minute contraction and expansion of the board while holding the backdrop fast.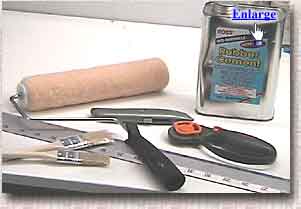 The rubber cement is in stock at Office Depot, and a quart can costs around six bucks. A couple small disposable brushes for application of the glue and a new paint roller completes the list of things you need to mount the backdrop. You will want to get brushes that fit inside the neck of the rubber cement can to dispense the glue. Don’t pour the glue out into a bucket – the glue dries extremely fast, and you will waste a lot of material.
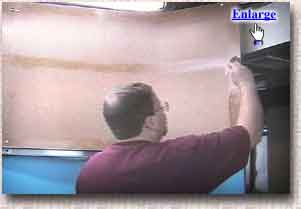 The glue is allowed to dry between the first and second coats. This will create a good "base" for the final coat of glue and the application of the backdrop.
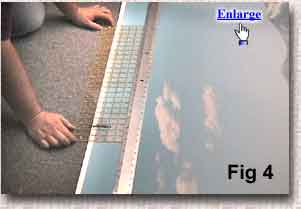 I’m cheating a little by using my wife’s quilter’s square – this handy item allows you to set the straightedge absolutely parallel with the edge of the backdrop. In figure 5, I double-check the measurement again, and in figure 6 I use a rotary cutter to cut the backdrop to size. You can use a utility knife, however the rotary cutter rolls as it cuts, eliminating the possibility of a tear, snag, or mishap. You can get a rotary cutter from Office Depot for about the same price as a quality utility knife. In the picture it appears I’m cutting the backdrop on carpet – in reality I have a scrap length of drywall under the backdrop as I’m cutting. You will want to find a firm but expendable surface for your backdrop cutting tasks.